|
|
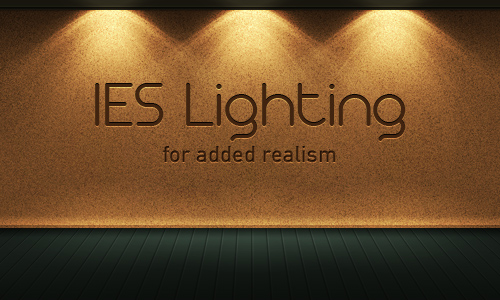
 How to Create a Realistic IES Lighting Effect in Photoshop
Tutorial Details- Program: Photoshop
- Difficulty: Advanced
- Completion Time: 2-3 hours
- Pages: 1-2-3-4-5-6
Final Product What You'll Be CreatingIn this tutorial, I’ll show you how to create a realistic IES (photometric) lighting effect. We’ll be using Photoshop CS4 as well as some free plugins and software. Let’s get started! Tutorial PreparationIn order to complete this tutorial you’ll need the following software: Prior to beginning the tutorial, make sure you have installed the Grid Generator and the AlphaWorks Photoshop plug-ins, and that you’ve downloaded Karbaras’s IES Generator (a standalone app) and the 1589835-nice.IES profile. Ok so the next few parts may appear upon separate pages due to the storage amount my hosting server supplies.
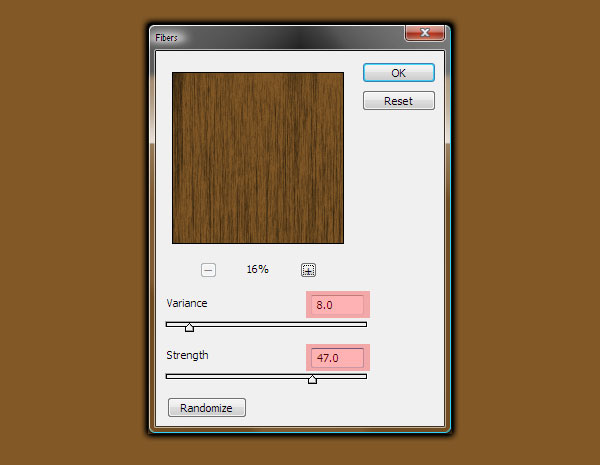
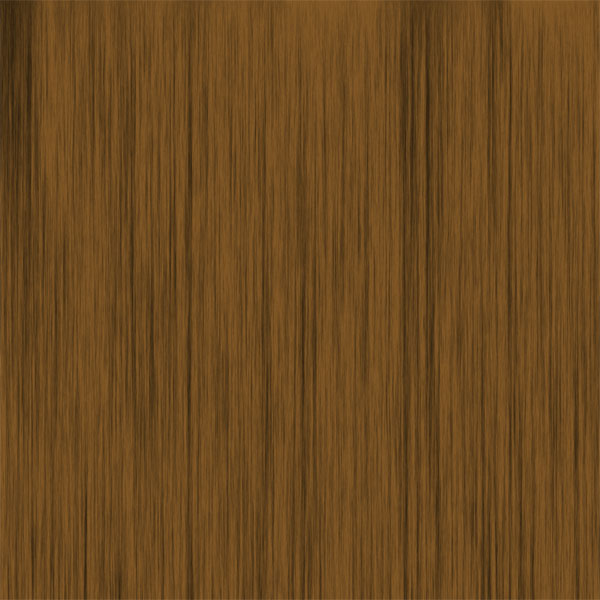
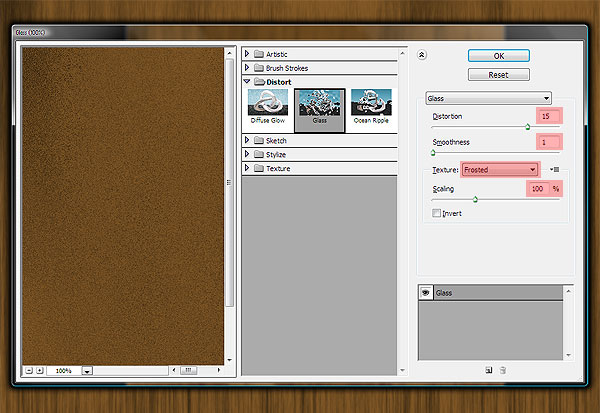
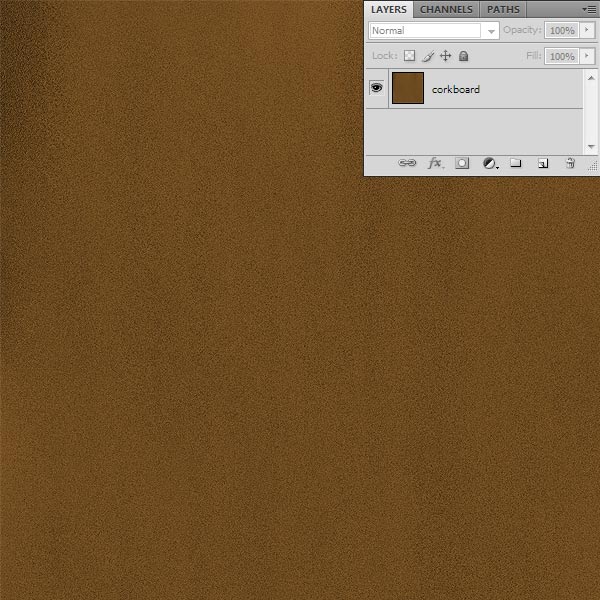
Step 1: Setting Up the Texture PSDThis PSD will serve as a place to create certain textures used in the final layout. I find it helpful to create textures in a separate document. It’s like a sandbox for experimentation. Make a new document in Photoshop that is 1440px wide by 900px high at 72dpi. This all depends upon your screen resolution if you are creating a wallpaper, however 1280x1024 seems to be the best in the sense that the quality is astounding. Set the foreground color to #34240f by clicking the topmost color swatch in the Tools palette and entering this number at the bottom of the Color Picker dialog box. Set the background color by the same method to #825826. Fill the "Background” layer with this color by pressing Command + Backspace. 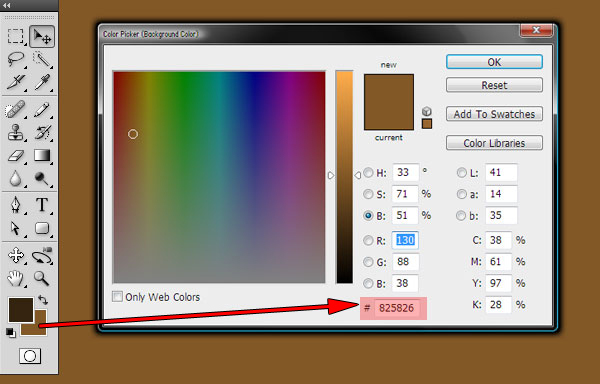 Step 2: Making the Corkboard TextureNow go to Filter > Distort > Glass. In the Glass filter dialog box, set Distortion to 15, Smoothness to 1, Texture to Frosted and Scaling to 100%. Click OK. Go to Filter > Render > Fibers. In the Fibers filter dialog box set Variance to 8.0 and Strength to 47.0. You will probably need to click the Randomize button several times to get a texture that has an even distribution of Step 1′s foreground and background colors. The best way to get a feel for the overall effect is to reduce the magnification of the preview image by clicking the minus sign below it until the minimum is reached, in this case 16%. When done, click OK. The result will be similar to this: Now go to Filter > Distort > Glass. In the Glass filter dialog box, set Distortion to 15, Smoothness to 1, Texture to Frosted and Scaling to 100%. Click OK. Name this layer "corkboard.” The result will be similar to this: The corkboard texture is complete. Save the PSD as "textures.psd” but don’t close it.
|
|